@capacitor/watch


CapacitorLABS - 此项目为实验性质。不提供支持。如有需要请提交 issue。
Capacitor Watch 插件允许你在 Web 代码中定义手表的 UI,并将其显示在已配对的手表上。
目前仅支持 iOS。本指南假设你已经为你的 Capacitor 项目添加了 iOS 支持。
另请注意,所有这些功能仅适用于真实的 Apple Watch。模拟器不允许应用与手表之间的通信,而真实设备可以。
安装
步骤 1
将手表插件添加到你的 Capacitor 项目中,然后打开 Xcode 项目:
npm install @capacitor/watch
npx cap sync
npx cap open ios
步骤 2
前往添加功能(Capabilities):
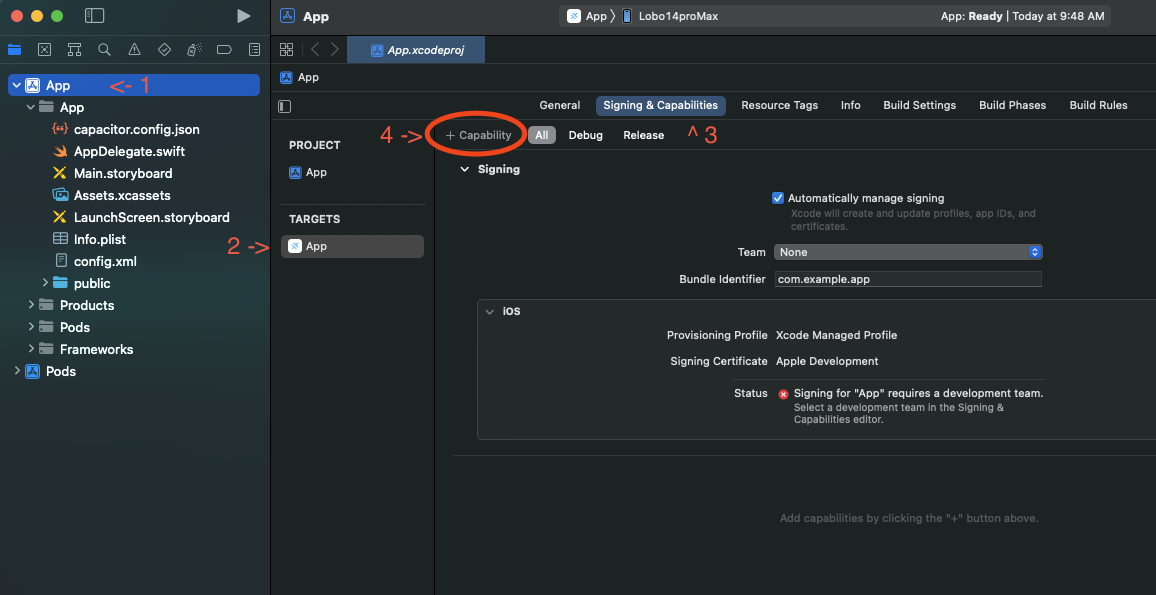
添加 "Background Modes" 和 "Push Notification" 功能。然后在 Background Modes 选项中,选择 "Background Fetch"、"Remote Notifications" 和 "Background Processing"。你的 App target 应该如下所示:

步骤 3
打开 AppDelegate.swift,在文件顶部添加 import WatchConnectivity 和 import CapactiorWatch,然后在 application(_ application: UIApplication, didFinishLaunchingWithOptions launchOptions: [UIApplication.LaunchOptionsKey: Any]?) 方法中添加以下代码:
assert(WCSession.isSupported(), "此示例需要 Watch Connectivity 支持!")
WCSession.default.delegate = CapWatchSessionDelegate.shared
WCSession.default.activate()
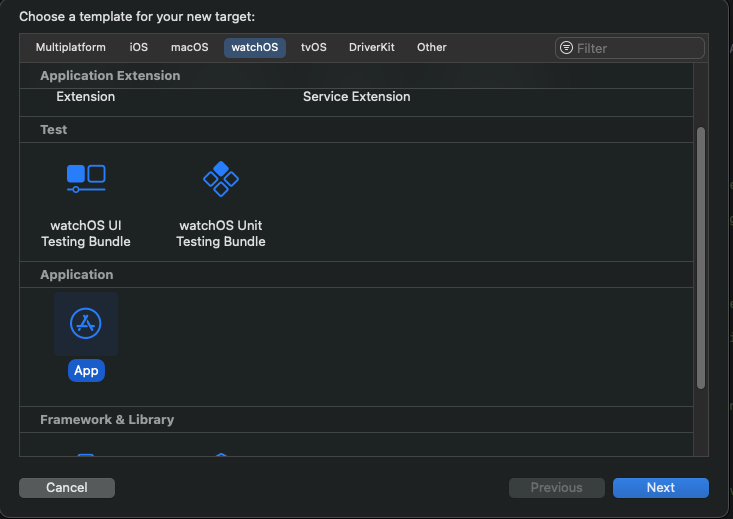
步骤 4
在 Xcode 中选择 File -> New -> Target,然后选择 watchOS 选项卡中的 "App":
点击 "Next",然后按如下方式填写选项:
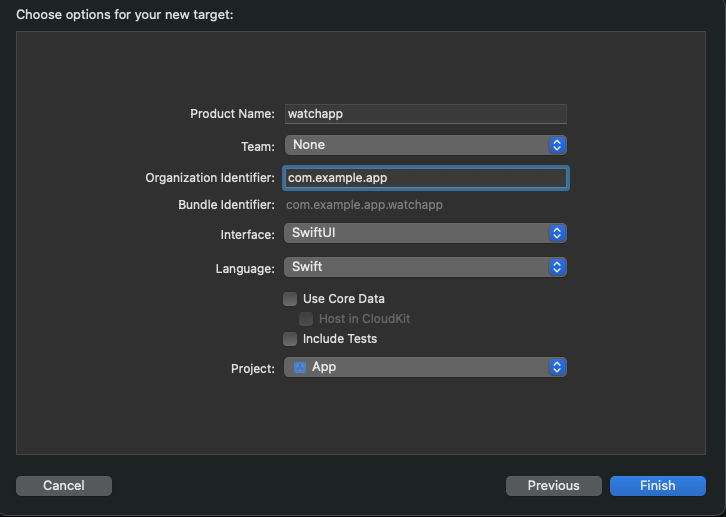
这个对话框可能有点令人困惑,关键点是你的 "Bundle Identifier" 必须是 [你的应用 bundle ID].watchapp,这样才能使手表<->应用配对正常工作。你还必须选择 SwiftUI 作为界面,Swift 作为语言。项目应为 App。
步骤 5
我们将添加使 Capacitor Watch 在手表应用中工作的代码。
如果你使用的是 Xcode 15 或更高版本,则需要从你的 node_modules 中添加 Capacitor Watch Swift Package:
首先,前往项目包依赖项(Package Dependencies):

然后选择 "Add Local"
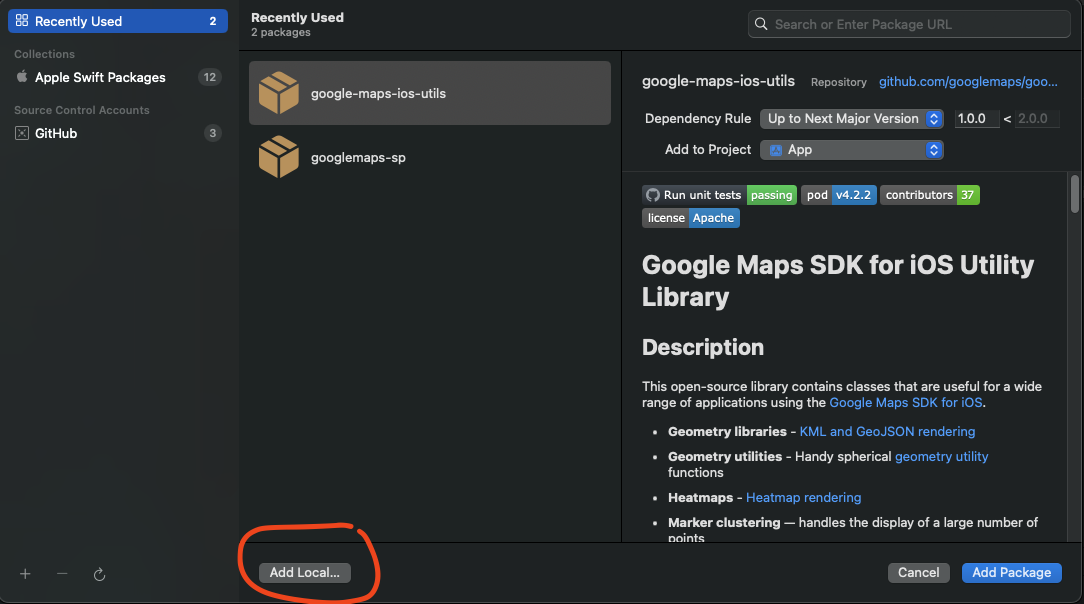
然后导航到 node_modules/@capacitor/watch/CapWatch-Watch-SPM 文件夹,点击 "Add Package"
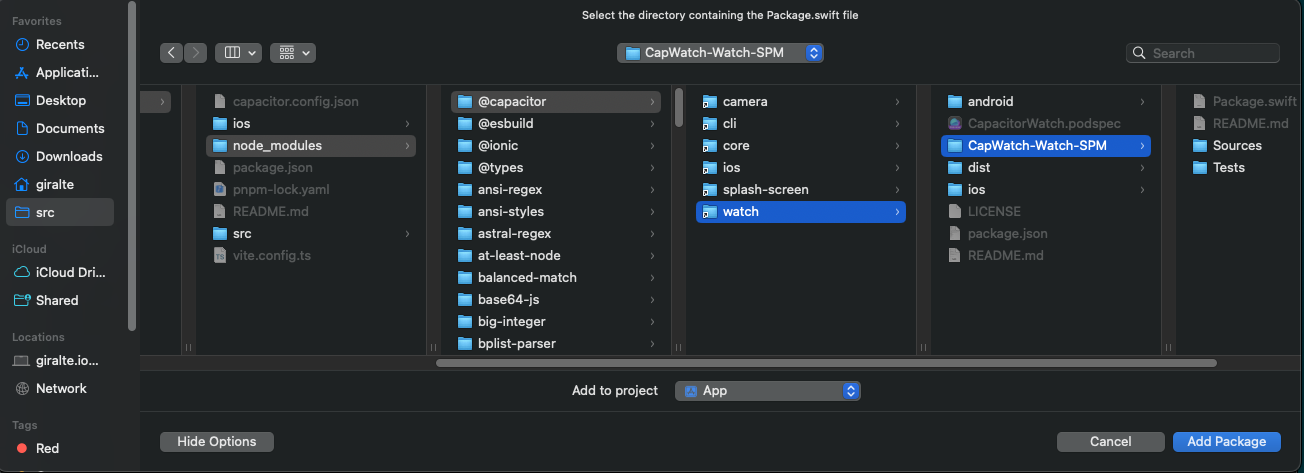
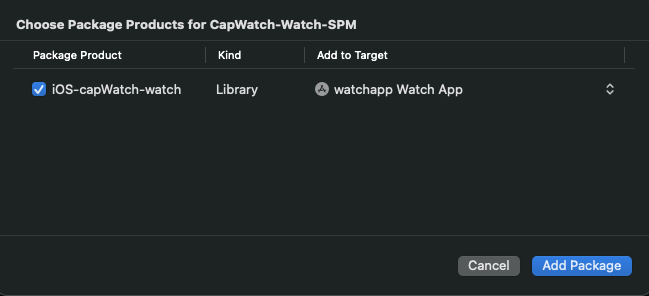
然后在右侧的列中,选择你的手表应用作为目标,点击 "Add Package"
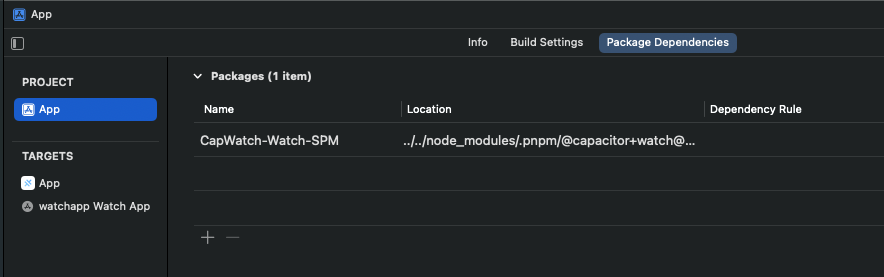
完成后,你的 Package Dependencies 应该如下所示:
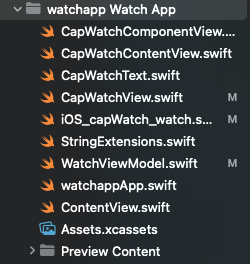
如果你使用的是 Xcode 14,你需要前往 https://github.com/ionic-team/CapacitorWatch/tree/main/packages/iOS-capWatch-watch/Sources/iOS-capWatch-watch,将所有文件复制到你的手表项目中,并确保选择的目标是你的手表应用。它应该如下所示:
步骤 6
然后打开手表应用的 "Main" 文件,应该是 watchappApp.swift。在 @main 语句上方添加 import WatchConnectivity 和 import iOS_capWatch_watch。然后将 ContentView() 所在行替换为以下内容:
最终文件应该如下所示:
import SwiftUI
import WatchConnectivity
import iOS_capWatch_watch

@main
struct watchddgg_Watch_AppApp: App {
    var body: some Scene {
        WindowGroup {
            CapWatchContentView()
                .onAppear {
                    assert(WCSession.isSupported(), "此示例需要 Watch Connectivity 支持!")
                    WCSession.default.delegate = WatchViewModel.shared
                    WCSession.default.activate()
                }
        }
    }
}
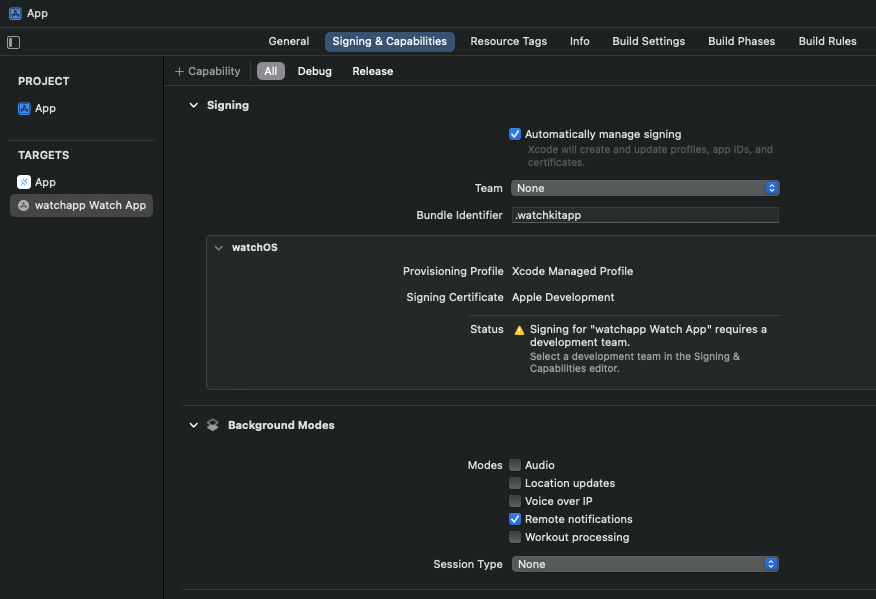
步骤 7
为手表应用 target 添加 "Background Modes" 功能,并启用 "Remote Notifications":
现在你应该已经准备好为 Capacitor Watch 进行开发了!
开发工作流
你仍然可以像普通 Capacitor 应用一样开发 iOS 应用,但要将内容运行到手表上,你需要在 Xcode 中更改目标和运行目标。你可以通过 Xcode 中上方中央附近的 "目标下拉菜单(Target Dropdown)" 来更改:
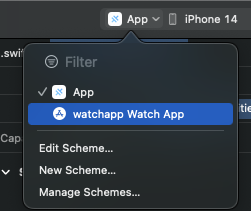
右侧部分允许你选择目标设备或模拟器。你需要选择与手机配对的手表,然后点击 "Run" 按钮或使用 "cmd+r" 快捷键运行。
在同步手表和手机应用时可能会遇到一些挑战。有时你会在 Xcode 控制台中收到错误,提示配套应用不存在。这种情况下最好的解决方案是重新构建并重新安装两个设备上的应用。
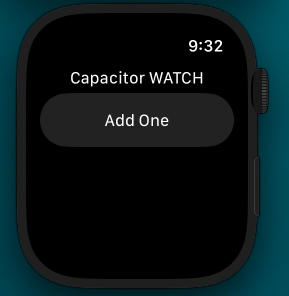
构建手表 UI 并发送到手表
你将使用一个长字符串来定义手表 UI。换行符分隔��组件。目前此插件仅支持 Text 或 Button 组件的垂直滚动视图。
定义好 UI 后,你可以使用 updateWatchUI() 方法将其发送到手表:
async uploadMyWatchUI() {
    const watchUI =
        `Text("Capacitor WATCH")
         Button("加一", "inc")`;

    await Watch.updateWatchUI({"watchUI": watchUI});
}
将生成如下效果:
与手表通信
这篇文章对原生方法及其影响进行了很好的总结:https://alexanderweiss.dev/blog/2023-01-18-three-ways-to-communicate-via-watchconnectivity
在手机端,你可以使用 Capacitor Background Runner 插件(https://github.com/ionic-team/capacitor-background-runner)实现这些方法。目前手表插件主要处理 didReceiveUserInfo 方法,当你的应用在后台时,你可以使用以下代码在 runner.js 中接收来自手表的事件:
addEventListener("WatchConnectivity_didReceiveUserInfo", (args) => {
  console.log(args.message.jsCommand);
})
你也可以为前台处理实现 runCommand 事件监听器:
Watch.addListener("runCommand", (data: {command: string}) => {
  console.log("手机端收到命令 - " + data.command);
})
这些命令是手表 UI 中 Button() 定义的第二个参数。可以是任意字符串。
更新手表数据
你可以通过在 Text() 元素中使用 $ 变量并通过 updateWatchData 命令更新来添加变量:
Text("显示我的 $number")
以下示例将在执行时更新 $number:
var stateData = {
  number: 0
}

async function counterIncrement() {
  stateData.counter++
  await Watch.updateWatchData({"data": convertValuesOfObjectToStringValues(stateData)})
}
手表的持久化
Capacitor Watch 会持久化你上次通过 updateWatchUI() 发送的 UI。来自 updateWatchData() 的状态不会被保留。
安装
npm install @capacitor/watch
npx cap sync
API
addListener('runCommand', ...)
addListener(eventName: 'runCommand', listenerFunc: (data: { command: string; }) => void) => Promise<PluginListenerHandle> & PluginListenerHandle
监听来自手表的命令
| 参数 | 类型 |
|---|---|
eventName | 'runCommand' |
listenerFunc | (data: { command: string; }) => void |
返回:
Promise<PluginListenerHandle> & PluginListenerHandleupdateWatchUI(...)
updateWatchUI(options: { watchUI: string; }) => Promise<void>
用 watchUI 替换当前手表 UI
| 参数 | 类型 |
|---|---|
options | { watchUI: string; } |
updateWatchData(...)
updateWatchData(options: { data: { [key: string]: string; }; }) => Promise<void>
更新手表的状态数据
| 参数 | 类型 |
|---|---|
options | { data: { [key: string]: string; }; } |
接口
PluginListenerHandle
| 属性 | 类型 |
|---|---|
remove | () => Promise<void> |